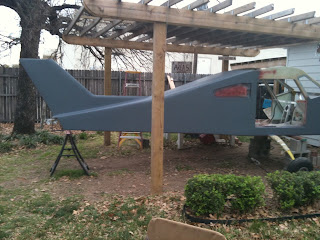
Thursday, March 29, 2012
Wednesday, October 26, 2011
More Construction photos
As I said earlier, I'm not using this site to document construction of the airplane any more but for family and friends who wonder if I'm still working, here is a summer's worth of work.
START AT THE BOTTOM AND SCROLL UP TO SEE IN THE ORDER THE WORK WAS DONE!

START AT THE BOTTOM AND SCROLL UP TO SEE IN THE ORDER THE WORK WAS DONE!
Rib in forming block
Not a fishing trip haul; lots of work producing these!
Ribs on the spar finally
Rivet lay-out, drill, deburr, dimple!
Rudder stops up close
Only a person searching for wing spars
can appreciate this label on my "NOS" spars.
Stabilator on the way to being built
This line of crooked rivets is on a
warbird in Jim Cavanaugh's museum in
Addison, TX at KADS!
A person building an airplane is keenly aware
of it's flaws; at least my rivets are a little
straighter than those above which
were done by a "real" airplane builder!

Saturday, April 9, 2011
Harbor Freight tools, does this LOOK like a quality tool to you?
Dang, they just don't make tools like they used too, I guess. I know this blog is about an airplane but I couldn't resist showing this Harbor Freight drill after drilling only 2 or 3 hundred 3/4" holes in some railroad track I'm using on a little project. You might be surprised how handy railroad track can be.
Dang, she twisted plumb in two! And heck, I think I paid a whole $12 dollars for her. What IS the world coming to?
Dang, she twisted plumb in two! And heck, I think I paid a whole $12 dollars for her. What IS the world coming to?
Tuesday, March 22, 2011
 After incredible time spent sanding/re-applying glass/resin/micro, and sanding some more, the fuselage is looking pretty close after priming.
The foam sandwich has 3 oz. (per sq. yard) fiberglass on the inside with 2024T3 hardpoints routed into the foam, covered with glass then bonded with 3M 2216 to fuselage with the hardpoints riveted to fuselage members. The outside of the foam has a minimum of 3 layers of the 3 ox/yd glass cloth with two more 6 oz. layers at all the corners to tie it all together solidly. A dry-ish micro was placed over all of this and blended together with LOTS of sanding and re-applying the mcro. The glass was covered with epoxy, not polyester (which melts foam); it was not vacuum bagged but rather excess resin was squeegeed off as much as possible, then soaked up with paper towels, with copious sanding on what remained after curing.
Tuesday, January 11, 2011
More construction pictures...
Tuesday, March 30, 2010
Airplane stuff around the house (or, Gina is really a GOOD sport)

Here is one tired and scruffy but running (we were told) Continental 0-470, right off a Cessna 180.
 ...and here she is after some TLC and wads of money. It's a big motor, relatively speaking, for a BD-4.
 Yes, we have a restaurant booth in our house, adorned with nifty Piper Comanche cowling and cool blue prop spinner.
You accumulate some interesting art objects while building an airplane, and Gina is REALLY a good sport with sharing the dining table and other areas of the house! This is an 82" Hartzell constant speed propeller---no, it doesn't leak oil on the table (yet).
Subscribe to:
Comments (Atom)


